Thursday, January 22, 2015

Choosing seeds for the garden – a few thoughts by Tina Ligon


So many seeds for such a tiny garden
It is currently January, snowing here in the CO foothills and cold. What better time than now to give some thought to this year’s garden plans? The seed catalogs are coming in the mail and it is so tempting to get a bit crazy with the dreams. However, living at 8000’ does put some limiting factors on what is reasonable to try growing. I did trial several new things last year and I will share what worked well for me.

 But first let’s list a few things to keep in mind when thinking about what to grow.
·         What are your goals? Is it food for you and/or wildlife, flowers, erosion control, re-vegetation, etc? If you are growing for pollinators, birds, etc. then watch out for varieties that are “pollenless”, flowers that have so many petals that insects can’t get to the goods (like a teddy bear sunflower). These may be nice for us to look at but don’t provide a good food source for our friends.
·         Take a look at the days to maturity/harvest/bloom. The frost free growing season can be pretty short up here. Will you be starting seeds indoors to transplant or direct seeding?
·         How much garden space do you have? I grew broccoli last year and decided it was just not worth the space for one head of broccoli and a few small shoots. A lot of lettuce can be grown in the area of one broccoli plant.
·         Succession planting – radishes are a great example, seed at two week intervals for a constant flow versus one large crop.
·         Mixing crops of different maturity dates - You can squeeze radishes in between more slow growing larger crops. The radishes are ready to be harvested by the time the “main” crop is getting larger. I had great luck with getting a crop of radishes grown between kale plants last year.
·         Don’t forget container gardening. There are some great varieties available that do well in containers. Look for smaller, compact varieties, such as determinate instead of the larger indeterminate tomatoes. I have even had luck with certain beans and cucumbers in containers up against a south facing wall that is protected from the wind. You can really pamper a container more than a whole garden.
·         Don’t forget to try something new.

Here are a few of the varieties that I had luck with last year and will be trying again.

Tricolor Salvia growing with mustard and collards, a new favorite.
Lettuce Romaine Little Gem Organic 68 days. Also called Sucrine or Sugar Cos, Little Gem is an English heirloom that is a very small variety of romaine, but has the succulent sweetness of a butterhead
Maruba Santoh (35 days) Open-pollinated. Brassica rapa (pekinensis group) With Maruba you get four vegetables in one. The loose round vibrant chartreuse leaves provide a mild piquant mustardy flavor while the flat white stems impart a juicy crisp pac choy taste
Organic H-19 Little Leaf Cucumber –(58 days) Parthenocarpic plants produce fruit under stress and without pollinators, guaranteeing high yields in the field or under cover. Compact vines are multi-branching and will climb easily. Medium-sized fruits are smooth and tapered with white spines. Works well in containers
Yaya Carrot OG (58 days) F-1 hybrid. Slightly shorter-rooted than Nantes Fancy but more flavorful. Crisp clean sweet carrot flavor. Can be used for baby or full-sized carrots.
Radishes – Pink Beauty, Shunkyo Long Pink, French Breakfast, Cherry Belle, Easter Egg
Gilfeather Turnip (Rutabaga) – I really liked the flavor of this and also harvested some of the leaves like collards.
Lacinato Rainbow Kale
Cylindra beets (56 days) HEIRLOOM A uniquely-shaped 6” cylindrical beet with especially sweet flavor and a fine grain
Tomatoes – Fakel, Aurora, Moscow, Sahsa’s Altai, Stupice (all of these had some season extension protection)

Happy gardening!

Thursday, January 15, 2015

SO YOU WANT TO START A WORM FARM? by Molly Niven


Why worms?  You want to recycle your food scraps; you don’t want to buy plant food; you want the best fertilizer that is the most accessible to plants,  you want to create a healthy soil structure with good drainage and you don’t want to worry when you leave town for a 2 -3 weeks!

3 BASIC STEPS

1.  Equipment and Supplies

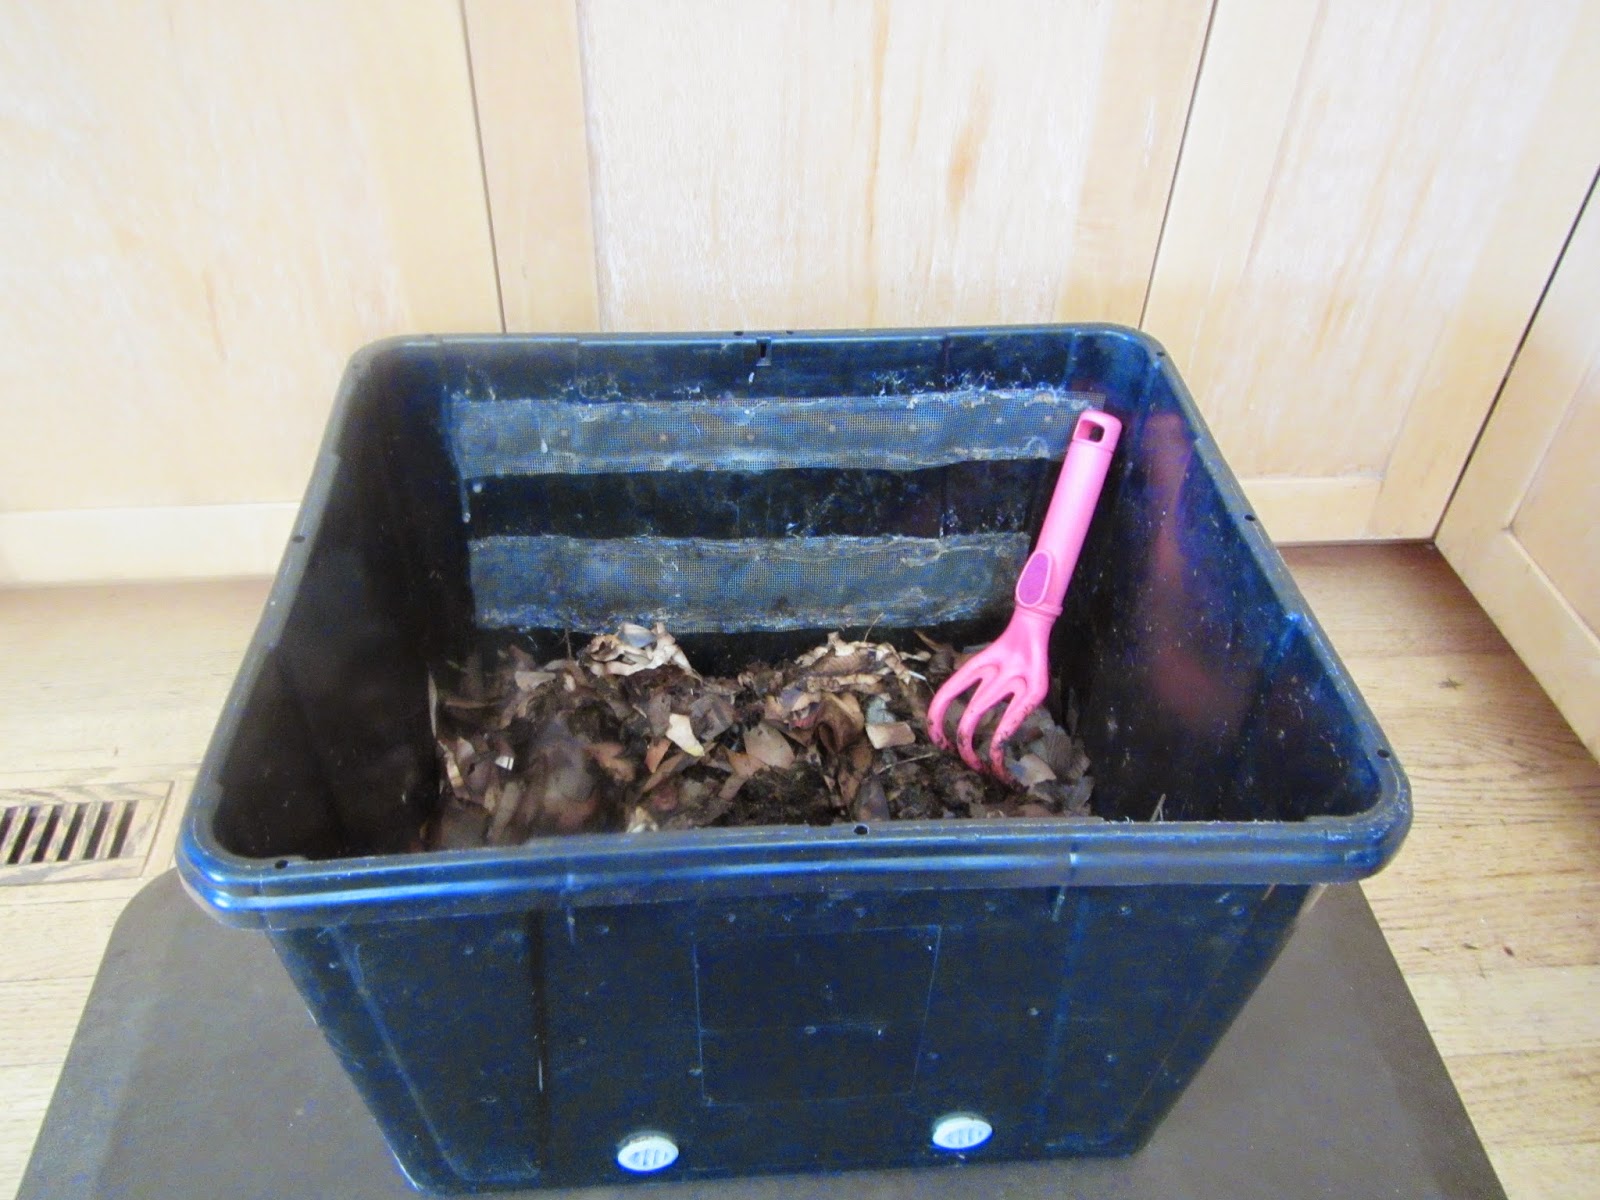
worm bin:  Buy or make your own.  How big?  One square foot of surface area for each pound
of food scraps generated per week.  Worms need oxygen!  One solution:  Drill about ten 1/8” holes at the top of both sides of a plastic container (2-foot by 1-foot plastic bin with lid that is 8 to 20 inches deep.). For drainage, drill six ¼-inch holes, equally dispersed, along the bottom of each side of the bin. I hot glued some screen on the inside.  Put your bin on a plastic tray to catch any extra water.

bedding:  For a 2’ x 2’ plastic bin,  tear or shred about 2 -4  lbs. of black and white newspaper, office paper or cardboard.  Soak this in water, squeeze the water completely out and put it in the bin.  Fluff it up so that your bin is about 2/3 full.  Add a couple of handfuls of healthy garden soil to introduce beneficial microorganisms and aid the earthworms’ digestive process (they have gizzards, not teeth, that help them break down the food).  If the bedding gets dry, spray some water over the top.
           
worms:  There are over 4,000 species of earthworms but only eisenia fetida (common name: red wigglers) are best suited for vermicomposting.  You will need about 1 lb (about 1000 worms) for each square foot of surface area of your bin.  Find them on line or from any worm farmer, as they need to be divided 1 -2x/year.   Spread them across the bedding and let them settle in for a couple of days before feeding them.

food scraps:  Worms like vegetables, fruits, crushed eggshells, tea bags, coffee grounds, shredded paper and coffee filters.  To speed up the process I usually chop up the scraps.  It takes a long time for them to eat citrus and seeds so I avoid these.  Meat attracts rodents!  Bury the scraps in one corner of the bin.  Alternate corners with each feeding.  I usually wait until most of the food is gone before giving them more.  To avoid fruit flies, bury the food and don’t overfeed them!  


2. Harvesting your vermicompost This is a mixture of worm castings and partially decomposed bedding and food scraps.  The more varied the diet, the more nutritious the castings.  In about 3 – 4 months you will be ready for your first harvest.  Here are two ways to separate out the castings:
·         Feed your worms on one side of the bin for 3 – 4 weeks, and then remove the castings from the other side.  Add new bedding to this area and feed them some of their favorite food.  Reverse the process.  At this point, you will probably have too many worms for this size bin so give some away!  There will be some stragglers in the castings so pick them out or they will die.
·         Worms do NOT like light.  Shine a light on top of the farm, wait a few minutes for the worms to dive down, remove the castings from the top layer.  Repeat.

3.  Using your vermicompost 
·         Mix the vermicompost into your garden soil or dig it in around trees and shrubs. For optimum results castings to soil ratio is 1:4
·         Mix it into potting soil for container plants.
·         Make ‘worm tea’ by adding 2 tablespoons of vermicompost to one quart water and let it steep for a day, mixing occasionally.  Use within 24 hours.

Read more:
·         http://www.ext.colostate.edu/mg/Gardennotes/218.html      CSU Ext. CMG Garden Notes
·         http://www.bae.ncsu.edu/topic/vermicomposting/pubs/ag473-18_wormsrecycle-revised-2012.pdf   NCSU Worms Can Recycle Your Garbage
·         Worms Eat My Garbage by Mary Appelhof.  Kalamazoo: Flower Press, 1997.  This is the bible for worm farming!
·         The Earth Moved by Amy Stewart, Algonquin Books of Chapel Hill, 2005.  A page turner on the remarkable achievements of worms.
 

The NPK (nitrogen, phosphate, and Potassium) are locked in the castings  (worm poop) and released into the plants slowly as micro-organisms break it down.

Monday, January 12, 2015

African Violets- My Choice for Indoor Plants to Enjoy by Ed Powers


I have grown and propagated African Violets for more than 30 years and have enjoyed it thoroughly.  I will admit that I have had a lot of trial and error with them over these years, but enjoyed it all.
They are my favorite flowering house plant. They are easily propagated from a leaf cutting, and they bloom continually most of the year depending on where you live and how well they are taken care of.  They are available in many flower colors and forms.  Not only are the flowers colorful but many are collected for their leaf color and shape.  Truly an attractive plant to grow.
Here are a few hints in growing these beautiful plants. (When challenged, I always refer to university plant experts and noted authors on the subject.) 
To grow African violets, you must provide the proper amount of light, otherwise the leaf blades will become thin and the stalks elongated. The plants often will retain normal color even when they don't get enough light, but they will rarely bloom. When the light is too bright, growth slows and leaves become pale or yellowish green. Leaves are often darker when they are shaded by other leaves and cause flowering to continue at a decreased rate. Eastern and northern exposures provide ideal light conditions, but filtered light in south or west windows also is acceptable. In addition, African violets grow well under artificial light.
Night-time temperatures for African violets should be between 65 to 70 degrees Fahrenheit, and day-time temperatures should be between 75 to 85 degrees. At low temperatures, the leaves on the plants turn dark, appear water-soaked, and eventually die. Plants grown on a window sill can be easily damaged by low temperature conditions, and may freeze if they touch the glass.
When repotting African violets, use potting soils specifically blended for these plants. As a general rule, water African violets only when the soil surface feels dry. Never wait until the soil becomes hard or the plants begin to wilt. Apply enough water each time to thoroughly saturate the soil, and be sure to discard any excess water collected through the bottom of the pot. To prevent spotting, avoid splashing cold water on the leaves.
Most water-soluble house-plant fertilizers are suitable for African violets. Apply fertilizer according to the manufacturer's recommendations, or use your best judgment based on personal experience. As a general rule, plants should be fertilized every four to six weeks. If the leaves become pale green and the plant begins producing fewer and smaller flowers, it's time to fertilize.
I have found 3 ways to propagate African violets. 1.Cut off a young leaf with its stalk and immerse the stalk in warm water. 2. Cut off a young leaf with its stalk, put it in a small pot with soil and cover with a zip lock bag. New roots will arise from the stalk and can be planted immediately.  You will have a new plant within 2-8 weeks.  Flowering will happen within 4 months.  3. The only other way to propagate violets is to grow from seeds, the most difficult but doable.

Monday, January 5, 2015

Onions – Starting from Seed by Tina Ligon


Onions growing in the garden with Tricolor Salvia – Makes for a pleasing planting

It is now the end of the year, literally it is Dec. 31, and I have to admit my mind is more on staying warm during this frigid cold weather here in the Colorado foothills than gardening. However, I do like to grow onions from seed and it is time to start planning. Onions require about 14 – 16 weeks from the time of starting from seed to planting the starts outdoors. In order to be ready for a May planting here in my Zone 5a garden at about 8000’ that means getting those seeds started indoors in January.
There are three choices for starting onions – from seeds, transplants or sets. I like the greater variety available by starting from seed. An added benefit is that you can harvest those baby plant trimmings and eat them when you have nothing else growing. When buying onion seed, only get the amount you will use during the current growing season. Onion seed viability starts to decrease significantly after one year. If you want to check any older seed you have, it is easy to do a germination test by placing some of the seed on a wet paper towel and placing it in a plastic bag or air tight container in a warm place. The viable seed should start to sprout in about a week or less at 70°F. Some houses may be on the cool side in January so look for a warmer spot like the top of a refrigerator or under a light.
Used salad containers make great onion starting containers, nice depth
The plastic containers used for salad mixes makes a great seed starting container. Onions need depth for root development. The young plants also need adequate lighting. 12 hours underneath florescent lights per day is sufficient. Keep the lights within inches of the growing seedlings. As the seedlings grow, trim them to keep at about 3 inches in height. When the plants have started to send roots to the bottom of the container they can be transplanted to new individual containers (plastic cups with drainage holes are a good option). Groups of three seedlings per cup are fine.
Plenty of light, regular trimming and light feedings of nutrients should give you great plants for transplanting into the garden. I have found Copra to be a great onion for my area. It is a nice size, flavor and great storage onion.
Happy gardening!   
Some great references: